Kerry Wan/ZDNET
Follow ZDNET:
Add us as a preferred source on Google to stay informed about the latest innovations in technology, design, and entertainment.
When it comes to upgrading your TV’s audio performance, the most effective and impactful improvements often come not from purchasing the most sophisticated speakers or high-end soundbars, but from refining the acoustic characteristics of the space in which you watch. The physical environment of your living room, den, or home theater has an enormous influence on sound perception. Encouragingly, achieving a noticeably enhanced listening experience doesn’t require a large investment in specialized or professional soundproofing solutions. In most cases, minor adjustments, budget-friendly materials, and strategic placements of everyday items can dramatically elevate the richness and clarity of your television’s sound. Beyond physical modifications, your TV may also be concealing a number of built-in configuration options or sound calibration menus that, once properly tuned, can push the limits of its audio quality even further.
Also: Why televisions tend to appear brilliantly luminous in showrooms yet seem muted or dull within the subdued lighting of your own living room.
To assist you in crafting an environment that fosters clean, balanced, and immersive sound, I have compiled a list of practical methods and easy-to-implement strategies. These techniques not only minimize unwanted echoes and muffled dialogue but also allow you to create a listening space that feels professional—without requiring significant financial outlay.
**Soft materials and surfaces**
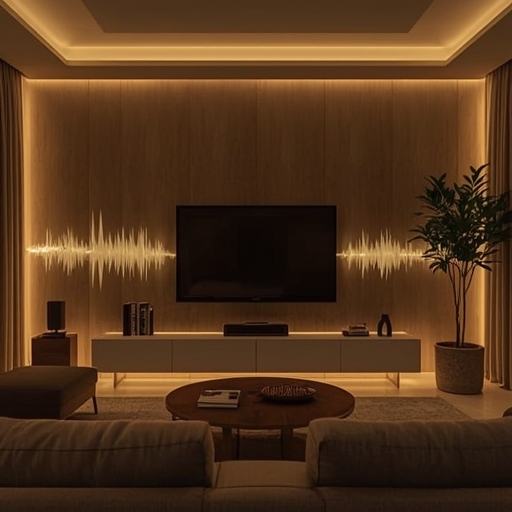
Sound, by nature, behaves much like a wave, traveling through air and reflecting off certain surfaces. Hard, flat materials such as bare walls, tiled floors, and ceilings tend to reflect sound energy back into the room. The result is often an unpleasant acoustic environment filled with hollow echoes, metallic or tinny tones, and confused or overlapping dialogue where distinct frequencies interfere with one another. Fortunately, mitigating this issue can be both simple and aesthetically pleasing. The key lies in introducing soft, absorbent materials — items that naturally capture and dull stray sound reflections.
Fabrics, leathers, and textiles provide this absorbent quality. When sound waves encounter these materials, much of their energy is dissipated as a small amount of heat rather than bouncing back into the room. Everyday furnishings like couches, thick rugs, plush throw pillows, and soft blankets become unexpected yet powerful acoustic tools. Even wall-mounted decorations such as canvas artwork help absorb and diffuse sound waves, reducing unwanted reverberation. With just a bit of thoughtful rearranging — perhaps repositioning a sofa against a wall or placing a rug beneath your coffee table — you can make your sound environment feel more intimate and engaging, often at zero cost.
**Sound-deadening curtains and studio foam**
Even if your living room’s interior acoustics are already well balanced, external noise can remain a significant challenge. Street traffic, construction sounds, or boisterous neighbors can all intrude upon your entertainment experience, muddying the soundscape and forcing your TV audio to compete for clarity. In these circumstances, sound-deadening curtains present a cost-effective and stylish remedy. Designed from densely layered fabrics or heavyweight materials, these curtains provide both aesthetic warmth and measurable acoustic isolation. Although they cannot completely eradicate outside noise, they do an admirable job of diminishing it to levels far less disruptive, enabling you to enjoy subtle dialogue or quiet background music without distraction.
For those who wish to go further, acoustic foam products — once reserved for professional studios — have become remarkably affordable and widely accessible online. Available as foam tiles, wedge panels, or corner bass traps, these tools can be strategically arranged on walls or room corners to manage reflection and absorption points. Whether you’re immersed in streaming services, a tense sports event, or an action-packed gaming session, a carefully treated space can deliver sound that feels both tailored and enveloping. Installation is uncomplicated and requires little more than a can of spray adhesive; the transformation, however, can be dramatic — often completed in mere minutes.
**Built-in calibration settings**
In addition to environmental tweaks, modern smart televisions now integrate increasingly sophisticated calibration tools designed to automatically optimize sound output depending on how and where the TV is placed. Because most TVs feature speakers that either fire backward toward the wall or downward toward the supporting surface, communicating the correct mounting configuration to your device is crucial for achieving accurate sound projection.
For instance, activating the wall-mount mode instructs the television to enhance the rear speakers’ output, leveraging wall reflections to produce a fuller, more dimensional soundstage. Conversely, when the TV rests on a stand or cabinet, enabling stand mode raises the intensity of downward-firing drivers, using acoustic reflections from the furniture surface to deliver balanced distribution.
Each manufacturer provides its own interface for sound customization:
– **Fire TV:** Navigate to Settings > Display & Sounds > AV Sync Tuning. This diagnostic test aligns audio and video timing, minimizing the slight delay or latency sometimes caused by reflective surfaces.
– **Hisense:** Go to Settings > Sound > Sound Mode Settings > Wall Mount Setup. Adjust accordingly to ensure optimal performance for wall-mounted displays.
– **LG:** Under Settings > Sounds > Additional Settings > Installation Type, select WALL MOUNT to calibrate the device’s internal processors for that orientation.
– **Samsung:** Depending on model, either access Settings > Sound Settings > SpaceFit ON, or navigate through Settings > Sound > Expert Settings > Auto Volume ON followed by Optimized Mode ON. The SpaceFit feature relies on an embedded sensor that continually analyzes ambient sound and adjusts equalization to provide a consistent listening experience regardless of the room’s acoustic variation.
– **Sony:** Choose Settings > Display & Sound > Sound > Acoustic Auto Calibration ON. TVs equipped with Sony’s Acoustic Surface Audio+ system use sensors to examine how sound interacts with the surrounding environment, automatically fine-tuning frequencies to maintain clarity and depth.
– **TCL:** Visit Settings > Display & Sounds > Audio > Mount Configuration: Wall to specify how your TV is positioned.
– **Roku TV:** Head to Settings > Audio > Optimize for wall-mounted TV to ensure accurate compensation for reflection changes.
These advanced calibration functions — though often overlooked — are extremely valuable for tailoring your viewing experience to the precise physical characteristics of your home. By understanding how your TV interacts with its immediate environment and applying these thoughtful adjustments, you can transform an ordinary viewing setup into a rich, detail-filled soundscape that brings every movie, show, or game vividly to life.
Also: Explore how to manage hidden smart TV features that track viewing activity — and how to disable them across brands for greater privacy.
Together, these foundational yet impactful changes—carefully combining environment, materials, and software settings—demonstrate that exceptional sound quality does not depend solely on expensive equipment. With patient experimentation and small refinements, your existing setup can produce deep, articulate audio that truly enhances every visual experience.
Sourse: https://www.zdnet.com/article/how-to-fix-tv-audio-sound/